Overview
Requests to all Studio API endpoints must be authenticated. Apps connect to Studio using OAuth 2.0, which is the standard used by most APIs to authenticate and authorize users. This guide will show you how to get an access_token to authenticate with, on behalf of a user, in your App.
Before starting the authentication process, be sure to do the following:
- Register your App
- Select the appropriate Scopes
- Provide a Redirect URI
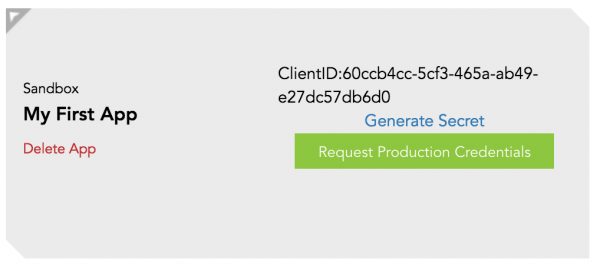
- Save your Client ID and Secret
There are two ways to authenticate your app:
- Authorization Code Flow – For web server applications
- Implicit Flow – For browser-based mobile applications
Authorization Code Flow
Use Authorization Code authentication only when your App can keep a secret (for example, if the App runs on a web server that you control). Make sure to treat the client_secret as you would treat a password.
1. Redirect user to Authorization endpoint
The first step is to request user authorization of your App. You will redirect the user to the Authorization endpoint where they will be asked to log in with their Studio credentials and grant permission to your App. To do this, make a GET request to the Authorization endpoint with the following parameters.
Authorization endpoint
https://authserver.bluebeam.com/auth/oauth/authorize
Request Parameters
Parameters must be passed in a query string.
| Name | Description |
|---|---|
| response_type | Must be set to code |
| client_id | Client ID received during App registration process; found on Back of App Card. |
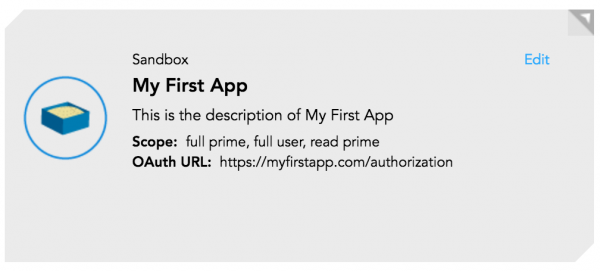
| redirect_uri | Redirect URI specified during App registration process; listed on Front of App Card. |
| scope | Space separated list of scopes specified during App registration process; listed on Front of App Card. |
| state | Random string generated by your App. Studio will return this state in a callback to your redirect_uri. Validate it against the state in your App to prevent cross-site request forgery. |
Example Request
GET https://authserver.bluebeam.com/auth/oauth/authorize?response_type=code&client_id=b5f9fc7c-60dd-469f-a21e-3f4a7ceb874b&redirect_uri=http://myserver.com&scope=full_user jobs&state=myteststate
User Experience
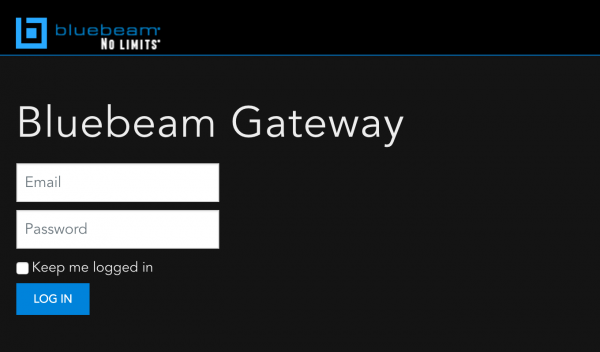
Users will be directed to the Bluebeam Gateway Login page.
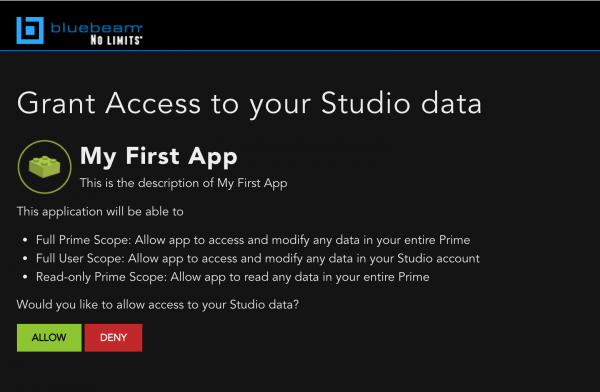
After logging in, the user may click Allow to grant your App access to their Studio data.
2. Studio redirects back to your URL with Authorization code
If the user grants access to your App by clicking Allow, you will receive a callback to the URL specified by redirect_uri in your original request. If the callback is successful, it will include an Authorization code that you will need to exchange for an access_token. Make sure to validate that the state in the response matches the state that you submitted in the original request. If an error has occurred, you will receive the redirect with an error parameter.
Response Parameters
Parameters are received as part of the query string.
| Name | Description |
|---|---|
| code | Temporary Authorization code that must be exchanged for an access_token. |
| state | Random string generated by your App. Studio will return this state in a callback to your redirect_uri. Validate it against the state in your original request to prevent cross-site request forgery. |
| error | This field contains an error code if the authorization request fails. See Common Response Codes for Authorization and Authentication Errors. |
Example Response
https://www.myserver.com/?code=acf3cabd-08c1-44db-88a9-4f785ec7c6ec&state=myteststate
3. Exchange code for access token
Now that you’ve received the authorization code, the next step is to exchange it for an access_token from Studio. To do this, make a POST request to the Token endpoint with the parameters below.
Token endpoint
https://authserver.bluebeam.com/auth/token
Request Parameters
Parameters must be form encoded.
| Name | Description |
|---|---|
| grant_type | Must be set to authorization_code |
| code | Authorization code returned in previous step |
| client_id | Client ID received during App registration process; found on Back of App Card. |
| client_secret | Client secret found on Back of App Card in App Management |
| redirect_uri | Redirect URI specified during App registration process; listed on Front of App Card. |
cURL Example
curl https://authserver.bluebeam.com/auth/token \
-d grant_type=authorization_code \
-d code={code returned from previous step} \
-d redirect_uri={your redirect_uri} \
-d client_id={your client_id} \
-d client_secret={your client_secret} \
-X POST
Response Parameters
| Name | Description |
|---|---|
| access_token | Bearer token used to make requests on behalf of the user |
| expires_in | Time in seconds until the token expires |
| refresh_token | Can be exchanged for a new access_token and refresh_token |
| refresh_token_expires_in | Time in seconds until refresh_token expires |
| token_type | This will always be “bearer” |
| userName | Set to the Studio user’s email address that acquired a token |
| scope | Space separated list of scopes |
| .issued | Set to the date and time that the access_token was issued |
| .expires | Set to the date and time that the access_token will expire |
4. Use access and refresh tokens to access the API
Once you have received an access_token, you can use it to access the API. To use an access_token, include it in the Authorization header:
Authorization: Bearer {a valid access_token}
Access Tokens
- An access_token is the actual string that allows you to make requests on behalf of the user.
- Every request to the Studio API must include a valid access_token.
- Each access_token is valid for 60 minutes.
- After an access_token expires, a new access_token may be issued in exchange for a valid refresh_token.
Refresh Tokens
- A refresh_token is always issued to you alongside each access_token.
- Unlike the access_token, which expires after an hour, each refresh token lasts for 60 days.
- A refresh_token can only be used once.
- Each time a refresh_token is used, a new refresh_token is issued back.
- You should store the refresh_token in a secure place.
- If a refresh_token is lost or expired, you will need to ask users to authorize again from the beginning of the OAuth flow.
To exchange a refresh_token for a new access_token and refresh_token, make a POST request to the Token endpoint:
Token endpoint
https://authserver.bluebeam.com/auth/token
Request Parameters
Parameters must be form encoded.
| Name | Description |
|---|---|
| grant_type | Must be set to refresh_token |
| refresh_token | Must be set to the value returned during authorize call |
| client_id | Client ID received during App registration process; found on Back of App Card. |
| client_secret | Client secret found on Back of App Card in App Management |
cURL Example
curl https://authserver.bluebeam.com/auth/token \
-d grant_type=refresh_token \
-d refresh_token={your refresh_token} \
-d client_id={your client_id} \
-d client_secret={your client_secret} \
-X POST
Implicit Flow
Use Implicit Authentication Flow when the client can’t keep a secret, for example a JavaScript app.
1. Redirect user to authorization endpoint
The first step is to request user authorization of your App. You will redirect the user to the Authorization endpoint where they will be asked to log in with their Studio credentials and grant permission to your App. To do this, make a GET request to the Authorization endpoint with the following parameters.
Authorization endpoint
https://authserver.bluebeam.com/auth/oauth/authorize
Request Parameters
Parameters must be passed in a query string.
| Name | Description |
|---|---|
| response_type | Must be set to token |
| client_id | Client ID received during App registration process; found on Back of App Card. |
| redirect_uri | Redirect URI specified during App registration process; listed on Front of App Card. |
| scope | Space separated list of scopes specified during App registration process; listed on Front of App Card. |
| state | Random string generated by your App. Studio will return this state in a callback to your redirect_uri. Validate it against the state in your App to prevent cross-site request forgery. |
Example Request
GET https://authserver.bluebeam.com/auth/oauth/authorize?response_type=token&client_id=b5f9fc7c-60dd-469f-a21e-3f4a7ceb874b&redirect_uri=http://myserver.com&scope=full_user jobs&state=myteststate
User Experience
Users will be directed to the Bluebeam Gateway Login page.
After logging in, the user may click Allow to grant your App access to their Studio data.
2. Studio redirects back to your URL
If the user grants access to your application by clicking Allow, you will receive a callback to the URL specified by redirect_uri in your original request.
Response Parameters
The response will be returned in JSON format
| Name | Description |
|---|---|
| access_token | Bearer token used to make requests on behalf of the user. |
| expires_in | Time in seconds until the token expires. |
| state | Random string specified in the authorization request. |
3. Use access token to access the API
Once you have received an access_token, you can use it to access the API. To use an access_token, include it in the Authorization header:
Authorization: Bearer {a valid access_token}
Token Expiration
Access tokens issued by Studio expire. If you are using Authorization Code flow, make sure to cache the refresh_token to exchange it for another access_token without going through the entire authorization flow again.
| Name | Expires in |
|---|---|
| Access_token | 60 minutes |
| Refresh_token | 60 days |
| Authorization code | 5 minutes |